Equipment![]() Instruction
Instruction![]() Trouble-shooting
Trouble-shooting![]()
For over 30 years, Corbin's RFJM-22 die set has turned hundreds of thousands of fired .22 LR cases into excellent thin-wall bullet jackets for making .224 centerfire bullets. Likewise, the Corbin RFJM-6m die set (which is available for reloading presses as well as for all Corbin presses) can make the same 22 LR cases into jackets for .243 caliber light weight bullets. (See KIT-224R for more info.)

The equipment required for .224 jackets is the RFJM-22S for Corbin S-Press, RFJM-22R for reloading presses having standard T-slot rams like the RCBS series, and RFJM-22H for the larger Corbin CSP-2, CSP-2H, and CHP-1 HydroPress. Usually it is best to operate these presses in the long or reloading stroke mode, instead of the short or swaging stroke, when drawing cases.
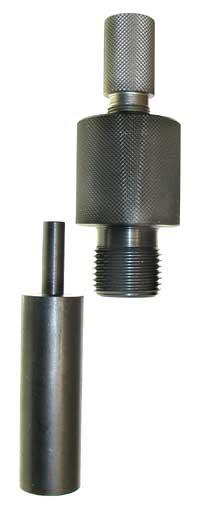
A .224 jacket maker has a threaded die (7/8-14 body for S-Press and reloading presses, 1.5 x 12 thread adapter for use in -H presses) and a separate drawing punch. The punch for the S-Press is threaded with 5/8-24 thread shank for the S-Press ram. The punch for a reloading press has a button base like a shell holder, to fit a T-slot ram. The punch for any of the Corbin -H presses has a base with a 1-in x 12 thread, to screw directly into the larger ram.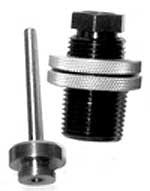 Earlier versions of the draw dies, illustrated in old books, used an ejector device made of a disk and tube, which fit around the press ram. When the ram was lowered, the tube came to rest on the frame of the press, and supported a disk with a hole, through which the punch was drawn to eject the jacket. Today's version uses a longer drawing punch, and simply pushes the case all the way through the die in one stroke, which takes slightly more effort but is more efficient. If the effort seems too great it is because the die is set to low in the press head. There is a fine point between having the die too high to strip off the jacket, and having it too low to get good leverage, but you can find it with a little experimentation.
The procedure is simple:
- Clean some .22 LR fired cases by boiling in water to which some detergent has been added, then rinse in hot water and allow them to dry. The hot water rinse can help shine tarnished cases if you add an ounce of vinegar to a quart of water. A tablespoon of salt also helps clean the cases, but then a clear water rinse is necessary to remove the salt.
- Stress relieve the cases by putting them through a self-cleaning cycle in an electric oven, or do the same in smaller lots by heating them to a faint red glow in a dark room using a propane torch (just a few seconds of flame is sufficient). This prevents folding of the ogive when you form the bullet, a result of the case being brittle. Too much heat results in softening the shank to the point where the bullet will acquire dents around the shank area. Between these two extremes is a wide range where the jacket you make will produce excellent bullets.
- Put the punch in the press ram and screw the die a few turns into the press head. You need at least three full threads engagement of the die in the press head. Normally the die will be set fairly high in the press to use the maximum leverage for easiest operation.
- Lightly lubricate the case and the punch with Corbin Swage Lube (a thin film wiped on with your fingertips is sufficient).
- Place a 22 LR case over the punch, and raise the ram. Adjust the die position so that the case is pushed into the die, the head is drawn out, and the jacket is stripped off the punch and remains in the die, high enough so that it is free of the die constriction (loose in the guide section of the die, above the drawing area). The setting is fairly critical...just part of a turn up or down can make the operation require too much force, or not quite get the jacket through the die constriction.
- Push all the 22 LR cases through the die one after another, picking them up as the start to emerge from the top of the die. You have just started making a lifetime supply of free .224 jackets! Turn them into bullets with any of Corbins bullet swage die sets for .224 caliber. The jackets can also be drawn to .204, .172, or even down to .142 in two or three steps with additional draw dies.
The RFJM-22R fits a standard 7/8-14 thread head, t-slotted ram reloading press (if it is capable of accepting standard RCBS shell holders). The RFJM-22S die fits the Corbin S-Press (CSP-1), and the RFJM-22H fits the larger Corbin Mega-Mite (CSP-2), and Corbin Hydro Press.
Making 6mm Jackets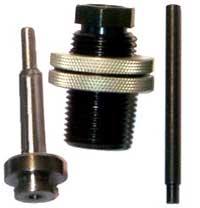
To make 6mm jackets, a flared punch with a profile like a bottle-necked cartridge case is used. This punch, with its ejector tube and disk, is the only difference between a RFJM-22R and a RFJM-6MR die set, so you can just get the punch and make both calibers in your reloading press! However, you do not push the jacket all the way through the die as with the .224. Instead, you merely push it far enough into the die to iron out the rim, and to flare the mouth. This jacket is really a jacket preform, not yet full diameter. The full diameter of 6mm is achieved by expanding the jacket while the lead core is seated into it. The flared mouth acts as a pressure seal and holds the lead pressure inside during the seating process.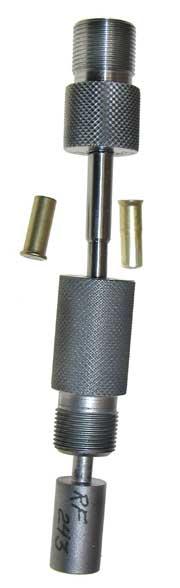
In the Corbin S-press, a special automatic ejecting die and punch set is used. The 6mm jacket making die screws into the press ram, and has an internal punch which pushes the jacket out on the down stroke. The bottle-necked or stepped draw punch screws into the floating punch holder, in the press head, in place of the usual hex bushing.
To use the die set in your Corbin S-press, put the internal punch and die into the press ram and screw the die down hand-tight only. Remove the hex bushing from the FPH-1-S floating punch holder, which is the 7/8-14 threaded cylinder that screws into the top of the press. Normally it would hold a punch with the hex bushing. Instead, the RFJM-6MS punch screws into the body of the punch holder, in the same place normally used by the hex bushing.
Adjust the position of the punch so it just pushes a 22 LR case into the die far enough to (a) unfold the rim and iron the top smooth, and (b) flare the mouth of the jacket. Do not force the 22 case any further into the die or over the punch shoulder than is necessary to do this. It is easiest to do consistently with the ram close to the top of the stroke and the punch holder set high in the press head. Always make sure you have at least a full two threads (or more) of engagement between the punch holder and the press head. If you don't use at least that many threads to hold the punch holder in place, the threads of the press head or punch holder may be damaged.
The same die set that works directly in the S-press (CSP-1) can also be used, with an adapter kit, in the CHP-1 Hydro Press, or the CSP-2 Mega Mite press. If purchased together, the package is called the "RFJM-6MH" die set. There are two components in the adapter kit, one of which has to separate parts: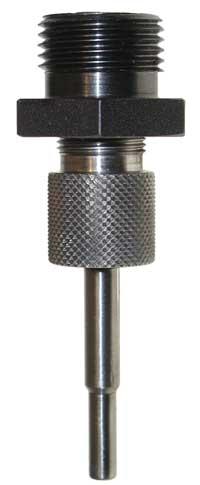
- FPH-S2H adapter -- screws into the FPH-1-H floating punch holder, replacing the standard hex bushing, and providing a 5/8-24 thread to accept the punch base.
- CHP-S2H adapter -- consists of a threaded ram adapter which screws into the 1 x 12 ram thread, and accepts the 5/8-24 die. A second part is an H-type punch head with a rod or short extension on one end. This is a dummy -H punch, which allows the larger press ram and ejection system to operate the much smaller and shorter -S type punch supplied with the die.
 Please note that the RFJM dies do NOT make a completed bullet: they turn the fired .22 case into a jacket, which in turn can be used with appropriate swage dies to make the bullet.
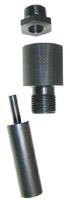 Orders may be placed by phone, fax, e-mail, or regular letter, and both VISA and MasterCard are welcome as means of payment. There is never an extra charge for using your bank card. Payment may also be made by check, money order, or direct wire transfer (call or write for procedure) with a $20 additional bank fee. Cash or money order COD shipments can also be made in the USA and Canada by UPS. Order on-line from our secure server shopping cart!
Start writing here...
How To Make FREE 224 and 6mm jackets